Personal tools
Set up the secure wireless network in Windows Vista, 7, 8 and 10
Setup via command line for Windows 7, 8 and 10 only
- Download this file (containing the configuration parameters of our secure wireless network)
- Open a Command Prompt window (press the Windows key, type in cmd and press Enter).
- Delete the profile of ictp-secure that might already be stored in your laptop, by typing the command
netsh wlan delete profile ictp-secure and hitting the Enter key.
-
Go into the Downloads folder (where the previously downloaded file should be) and add the ictp-secure file (hit the Enter key at the end of each line):
cd Downloads
netsh wlan add profile filename=ictp-secure.xml
Manual setup of Windows Vista and 7
- Click on the wireless network symbol in the lower-right corner of the screen and click on Open Network and Sharing Center.

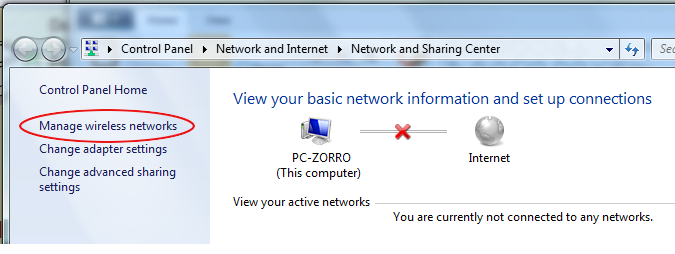
In the window that opens, click on Manage wireless networks in the left pane.
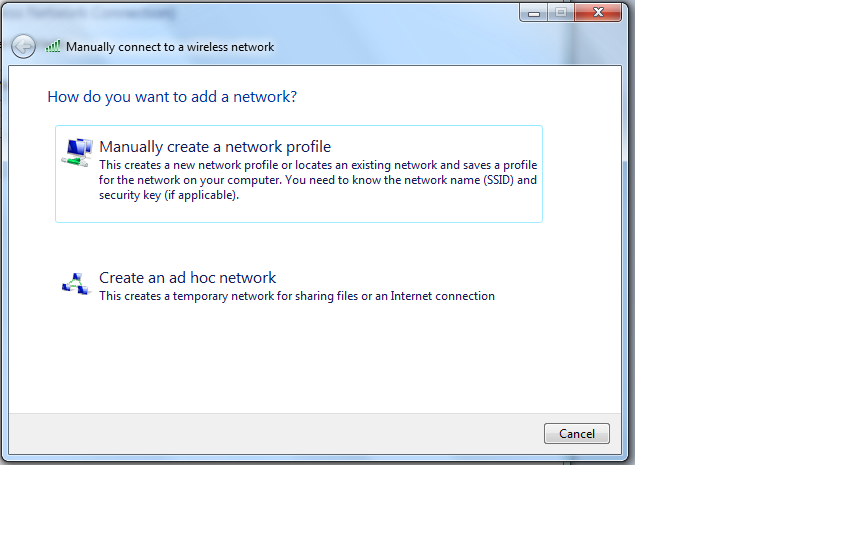
- Click Add and choose to manually create a network profile.
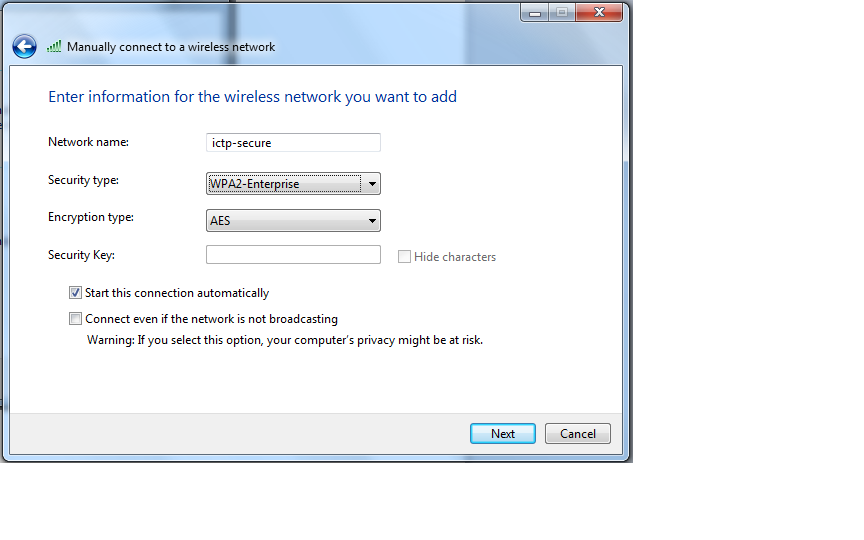
For Network Name (SSID) enter ictp-secure. For Network Authentication select WPA2-Enterprise to set up the network connection for WPA compliance (note: WPA and WPA-PSK are not same thing and selecting WPA-PSK will not allow the connection to operate properly). For Data Encryption select AES.
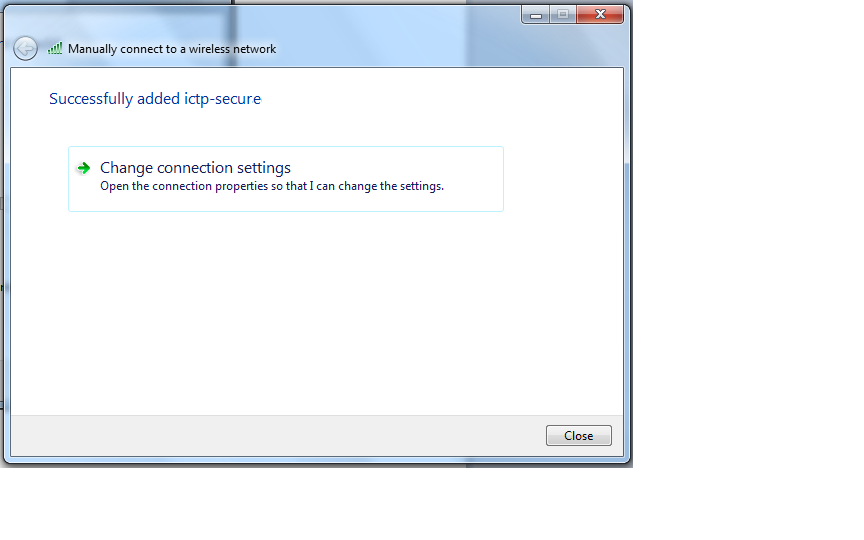
Click on Change connection settings.
- Click the Security tab and there the Settings button
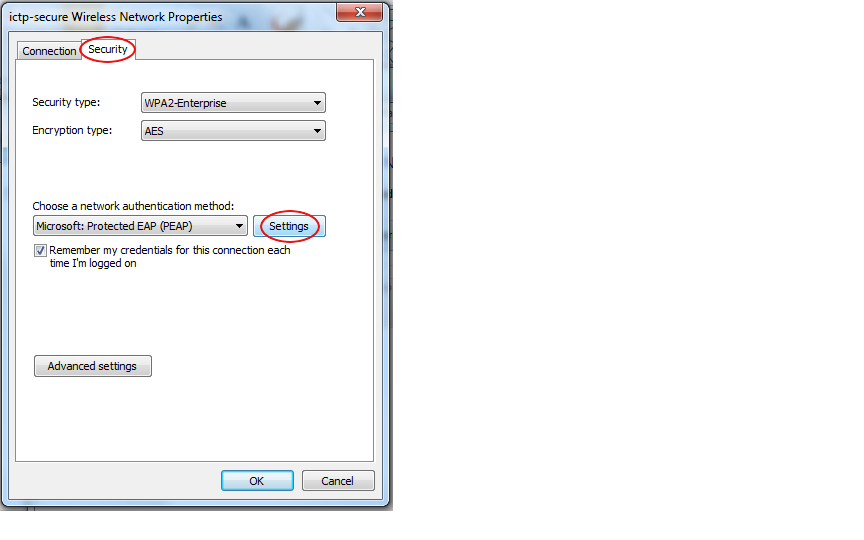
and uncheck the Validate server certificate option.
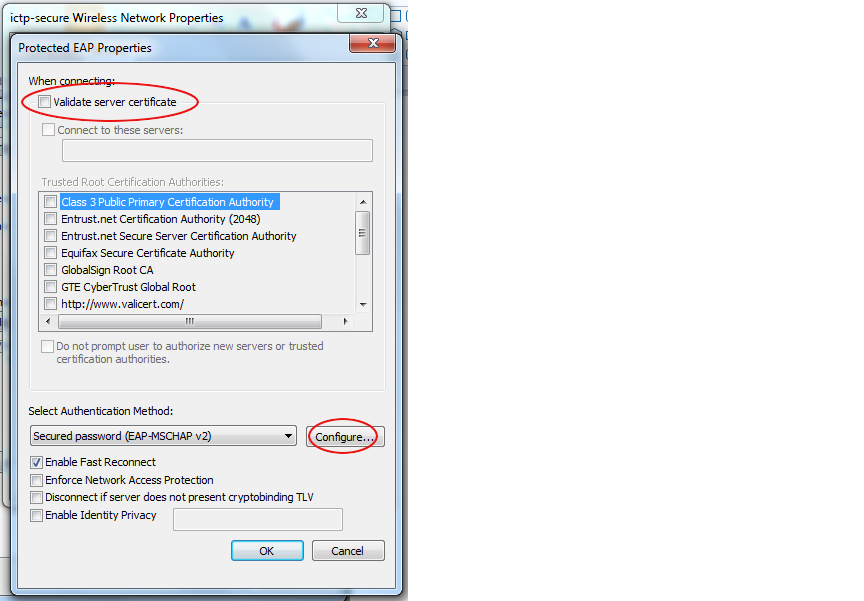
Click the Configure button at the bottom. Uncheck and turn off Automatically use my Windows login name and password.
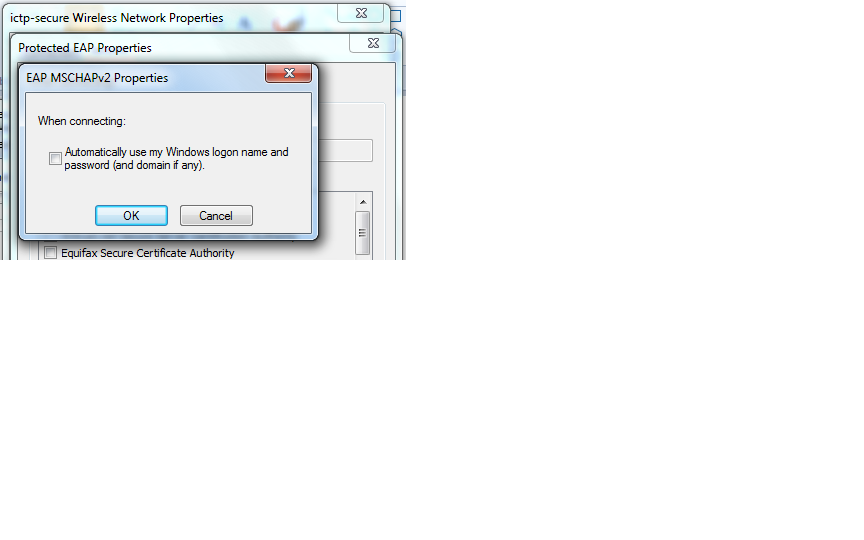
- Click OK buttons and close any Windows to exit the configuration. In a few seconds, the network card will contact the "ictp-secure" network.
- When asked, enter your ICTP user name and password. Then click OK.